Contents

Woodworking experts consider it essential that every woodwork enthusiast learns how to cut a notch in wood. And the best part is that you can learn to achieve this project using a myriad of tools.
Notching wood sometimes proves to be a big task for newbies, but once you know the tricks involved, you’ll never miss a thing. Notching has been known to be one of the best ways to keep your wood pieces stronger and long-lasting.
[note]In fact, this process further adds an aesthetic layer to wood projects such as bookshelves, arbors, and side-table bases. So are you eager to learn how to notch wood? Today, we’ll take you through the different procedures which you can engage in when notching wood. And you would become a pro in little to no time.[/note]
Required Tools for this Project
Cutting a notch in wood can be done in several ways, especially since there are a variety of tools that you can use. Woodworking tools come in various forms and functions; hence, notching wood is dependent on what tool you have in your workshop.
Nonetheless, the most common tools which any craftsman can use to cut a notch in wood are as follows:
[su_spoiler title=”Additional tools you’ll need when working with a router include:” open=”yes” style=”simple” icon=”plus” anchor=”” class=””]
[su_list icon=”icon: arrow-circle-right” icon_color=”#4f8901″]
[su_row class=””]
[su_column size=”1/2″ center=”no” class=””]
- Ruler/Set Square
- Gloves
- Saw
- Safety goggles
- Ear plugs
- Hammer
- Chisel
[/su_column]
[su_column size=”1/2″ center=”no” class=””]
- Router
- Workbench
- Measuring tape
- Clamps
- Masks
- Sandpaper
- Marking Knife
[/su_column]
[/su_row]
[/su_list]
[/su_spoiler]
The preliminary step when notching wood is preparing the wood. And this entails determining how large you want the notch to be.
Measure the notch first of all, and mark it. You can make marks on the wood using the marking knife or a carpenter’s pencil if you have one.
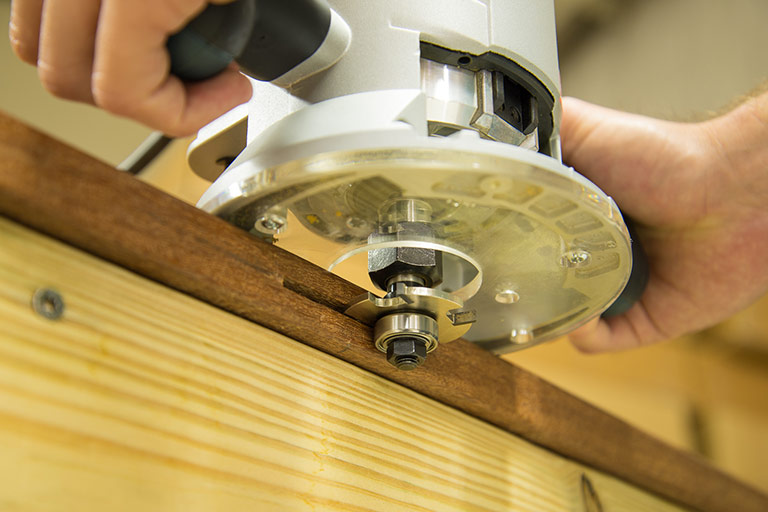
How to Cut a Notch in Wood with a Router
[su_divider top=”no” style=”default” divider_color=”#444″ size=”3″ margin=”15″ class=””]
[su_row class=””]
[su_column size=”1/2″ center=”no” class=””]
[/su_column]
[su_column size=”1/2″ center=”no” class=””]
Notching with a router takes the stress of cutting off of you. If you decide to use a router to cut a notch in plywood, for example, you should follow the steps below:
[su_dropcap style=”flat” size=”2″ class=”” dropcap_color=”#fa5738″]1[/su_dropcap]
Step
Use the best router guide or jig to route the opening of the wood. This often provides more precision than many other woodworking tools.
[su_dropcap style=”flat” size=”2″ class=”” dropcap_color=”#fa5738″]2[/su_dropcap]
Step
Set your depth to your preferred depth and plunge down into your wood piece until you have created the notch you want.
[/su_column]
[/su_row]
[su_dropcap style=”flat” size=”2″ class=”” dropcap_color=”#fa5738″]3[/su_dropcap]
Step
Once you have this, remove the plunge and observe the depth to be sure you have the same depth in all the areas you marked. As for the outer edge, you might want to finish it up with a hammer or chisel to get a perfectly notched project.
[su_dropcap style=”flat” size=”2″ class=”” dropcap_color=”#fa5738″]4[/su_dropcap]
Step
When routing rounded corners, you should exercise extra care as this process could sometimes appear imperfect. With your jig, you can cut the first notch. Next, use the router bits to clean up the edges or try a chisel to match the initial notch to the final cut.
How to Cut a Notch in Wood with Hammer and Chisel
[su_divider top=”no” style=”default” divider_color=”#444″ size=”3″ margin=”15″ class=””]
[su_row class=””]
[su_column size=”1/2″ center=”no” class=””]
[/su_column]
[su_column size=”1/2″ center=”no” class=””]
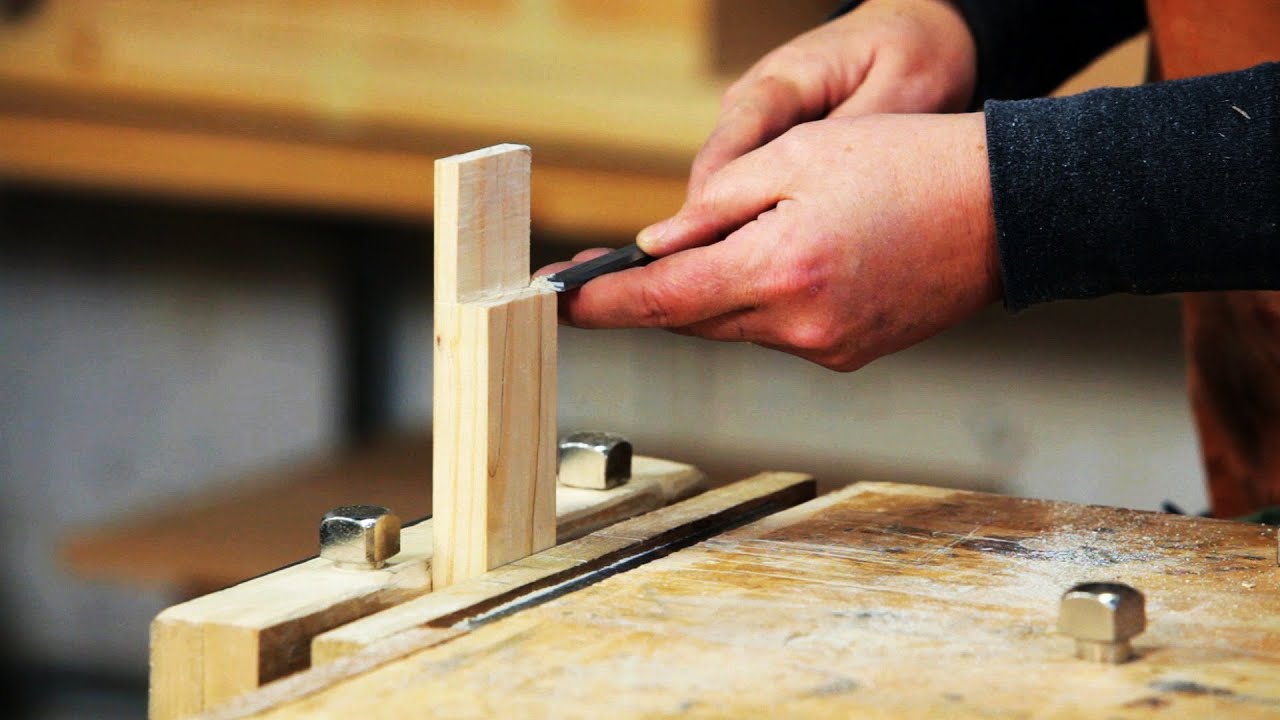
The use of the hammer and chisel is a common one. It has existed for a long while and many carpenters find these tools easily accessible. So, if you have only these two woodworking tools in your workshop, you can confidently notch that piece of wood you’re working on.
[su_dropcap style=”flat” size=”2″ class=”” dropcap_color=”#fa5738″]1[/su_dropcap]
Step
Use the chisel to mark your wood and ensure the marks are clear enough. Such clarity serves as the perfect starting point for your notching project.
[/su_column]
[/su_row]
[su_dropcap style=”flat” size=”2″ class=”” dropcap_color=”#fa5738″]2[/su_dropcap]
Step
After marking, cut out the lines using a marking knife. Cutting out the line helps you achieve a more achieve dimension. Remember to place the chisel along the line as you use your marking knife. In fact, this helps you to be precise and avoid ruining the grain.
[su_dropcap style=”flat” size=”2″ class=”” dropcap_color=”#fa5738″]3[/su_dropcap]
Step
Now, to remove the wood at the center of the notch, place the wood on your workbench. Set the chisel a little far away from the actual middle you want to cut. Next, begin hammering that point until you’ve carved the notch in the wood.
[su_dropcap style=”flat” size=”2″ class=”” dropcap_color=”#fa5738″]4[/su_dropcap]
Step
Since the notch still looks rough, you might need to keep repeating the process until you’ve cleared off every extra wood. When working with more than one piece of wood, repeat this notching procedure until you can fit the notched woods into themselves.
How to Cut a Notch with a Circular Saw
[su_divider top=”no” style=”default” divider_color=”#444″ size=”3″ margin=”15″ class=””]
[su_row class=””]
[su_column size=”1/2″ center=”no” class=””]
[/su_column]
[su_column size=”1/2″ center=”no” class=””]
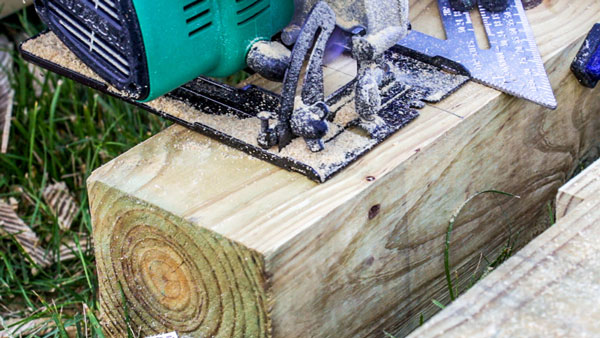
[su_dropcap style=”flat” size=”2″ class=”” dropcap_color=”#fa5738″]1[/su_dropcap]
Step
Measure the wood you intend to cut and mark it using a measuring tape and carpenter’s pencil.
[su_dropcap style=”flat” size=”2″ class=”” dropcap_color=”#fa5738″]2[/su_dropcap]
Step
The next basic step is setting your depth. Lift the guard of the circular saw and position the blade against the wood and set the blade height. Make sure it is leveled with the depth line you earlier created.
[/su_column]
[/su_row]
[su_dropcap style=”flat” size=”2″ class=”” dropcap_color=”#fa5738″]3[/su_dropcap]
Step
Tighten your wood piece using clamps or a vice to ensure that it doesn’t move as you cut along the bottom line. To get an accurate cut, you need to keep your saw flat against the wood. Being careful at this point also allows you to cut the notch at the depth you set.
[su_dropcap style=”flat” size=”2″ class=”” dropcap_color=”#fa5738″]4[/su_dropcap]
Step
When you have made cross cuts, begin to make parallel cuts to meet the bottom line of the wood’s surface. The purpose is to cut the notch from the wood top to the bottom line you earlier carved.
[su_dropcap style=”flat” size=”2″ class=”” dropcap_color=”#fa5738″]5[/su_dropcap]
Step
To clear the wood you’ve cut, hit the strips of wood with a hammer. When you can observe the leveled surface, clean the notch using a chisel. Sandpaper can come in handy to even out bumps.
Conclusion
This post has shown you how to cut a notch in wood using the mechanical router, traditional hammer, and chisel, and the circular saw. All of these tools make it easy for you to notch wood by yourself.
Follow the steps under each section carefully to achieve the expected results. Remember, you can use whatever tools you have in your workshop without having to stress about getting power tools. Nonetheless, if you’d rather save yourself the stress of hammering directly, the router would be the way to go.
Has this post helped you? Share your thoughts!