Contents

Any woodworker (professional or hobbyist) must know how to cut a square hole in wood. You must master the craft perfectly for you to build more creative and eye-catching furniture products. It is impossible to escape the skill because, at a point in woodwork, you will need to make a square hole. The good thing is cutting a square is easy, provided you have the basic woodwork skills and the right tools. This article will guide you to learn to make a square hole in wood.
Required tools
For this project, you will need the following tools
[su_spoiler title=”Required Tools for this Project:” open=”yes” style=”simple” icon=”plus” anchor=”” class=””]
[su_list icon=”icon: arrow-circle-right” icon_color=”#4f8901″]
[su_row class=””]
[su_column size=”1/2″ center=”no” class=””]
- Jigsaw
- Power drill or a woodworking router
- Sander or file
- Oscillating tool
[/su_column]
[su_column size=”1/2″ center=”no” class=””]
- Large drill bit
- Framing square
- Carpenter’s pencil (or marker)
- Protective gears (work gloves, ear, and eye protection gears)
[/su_column]
[/su_row]
[/su_list]
[/su_spoiler]
[su_divider top=”no” style=”default” divider_color=”#444″ size=”3″ margin=”15″ class=””]
[su_dropcap style=”flat” size=”2″ class=”” dropcap_color=”#fa5738″]1[/su_dropcap]
Step: Measure and Mark
[su_divider top=”no” style=”default” divider_color=”#444″ size=”3″ margin=”15″ class=””]
The initial step is to measure the square you want to cut out using a tape measure and marking out these dimensions on the wood you want to cut. Precision is vital if you want to finish a good project. Consequently, you need to capture accurate measurements so that you locate the square hole exactly where you desire it to be. You want to map out the dimensions for the square, to identify how large you need to make the square holes. If the square sits on a particular position on the wood, you need to consider these measurements as well. Now use a pencil and a square to trace the outline of the square on the wood. You want to make dark, thick lines to guide your cutting –make several passes with a carpenter’s pencil. A pencil is preferable because you can easily erase erroneous markings.
[su_divider top=”no” style=”default” divider_color=”#444″ size=”3″ margin=”15″ class=””]
[su_dropcap style=”flat” size=”2″ class=”” dropcap_color=”#fa5738″]2[/su_dropcap]
Step: Create the Pilot Hole
[su_divider top=”no” style=”default” divider_color=”#444″ size=”3″ margin=”15″ class=””]
Before you can commence cutting with a jigsaw, you need to drill out a pilot hole to serve as the starting point for your cut. The drill bit you use should be large enough such that the jigsaw fits through the pilot hole. Once you have your outline complete, take a drill, and position it in the inner side of the square in one corner. You need to drill a hole large enough to touch two sides of the marked square. The hole you drill must not project outside the boundary lines you traced for your square.
[su_divider top=”no” style=”default” divider_color=”#444″ size=”3″ margin=”15″ class=””]
[su_dropcap style=”flat” size=”2″ class=”” dropcap_color=”#fa5738″]3[/su_dropcap]
Step: Cut Out the Square
[su_divider top=”no” style=”default” divider_color=”#444″ size=”3″ margin=”15″ class=””]
With the pilot hole drilled in place, you are ready to commence cutting out the square. Take your jigsaw and place the cutting blade inside the pilot hole. Switch on the jigsaw and hold it firmly while you move it along the lines you traced for the square. Do not cut outside the square. It is good that you cut inside the square markings so that you do not ruin the wood in case you stray from the marking. Do not worry if the square is smaller than expected – you can widen the square using a file or sandpaper (an oscillating tool will also do the job). If you cut outside the marking and get a large square, there is no remedy other than pick another wood and start again.
[su_divider top=”no” style=”default” divider_color=”#444″ size=”3″ margin=”15″ class=””]
[su_dropcap style=”flat” size=”2″ class=”” dropcap_color=”#fa5738″]4[/su_dropcap]
Step: Smooth Finish
[su_divider top=”no” style=”default” divider_color=”#444″ size=”3″ margin=”15″ class=””]
Once you cut out your square, it is now time to clean your work. The jigsaw will probably leave some marks and rough edges. If you are highly skilled in using the jigsaw, you may have minimal finishing work to do. However, it is common to have some uneven surfaces that require some final touches.
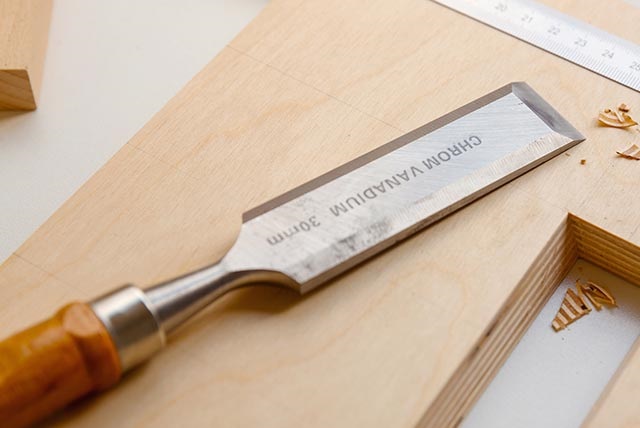
Use a file to clear away any rugged surfaces in the square you have just cut. You can also use a sanding wheel or an oscillating tool to remove the rough areas. Work off these imperfections slowly and keenly to avoid sanding out too much wood. This would enlarge your square, meaning you will waste your timber and end up redoing the entire process. Once the square looks smoother, proceed to finish the cleaning with sandpaper to make the square fine and smooth. Start with smooth grit sandpaper and repeat the process several times. Each time use higher grit paper until the square is perfectly flat.
Your safety
Any woodwork processes, including the use of power tools, are potentially risky and can cause injuries. It is good that you avoid small accidents such as cuts or splinters flying into your eye. Loud noises from the power tools can harm your ear. To stay safe, consider the following precautions:
Wear eye and ear protective gears before you can start your woodwork projects.
Wear fitting clothing always, avoid loose clothing – they can get entangled in a rotating machine and cause serious injuries
- Tie up long hair ina bun
- Keep your hands at a safe space from the jigsaw
- Use clamps to secure the jigsaw in place
- Avoid exerting pressure on the machine.